|
Click the pictures to zoom in |
|
|
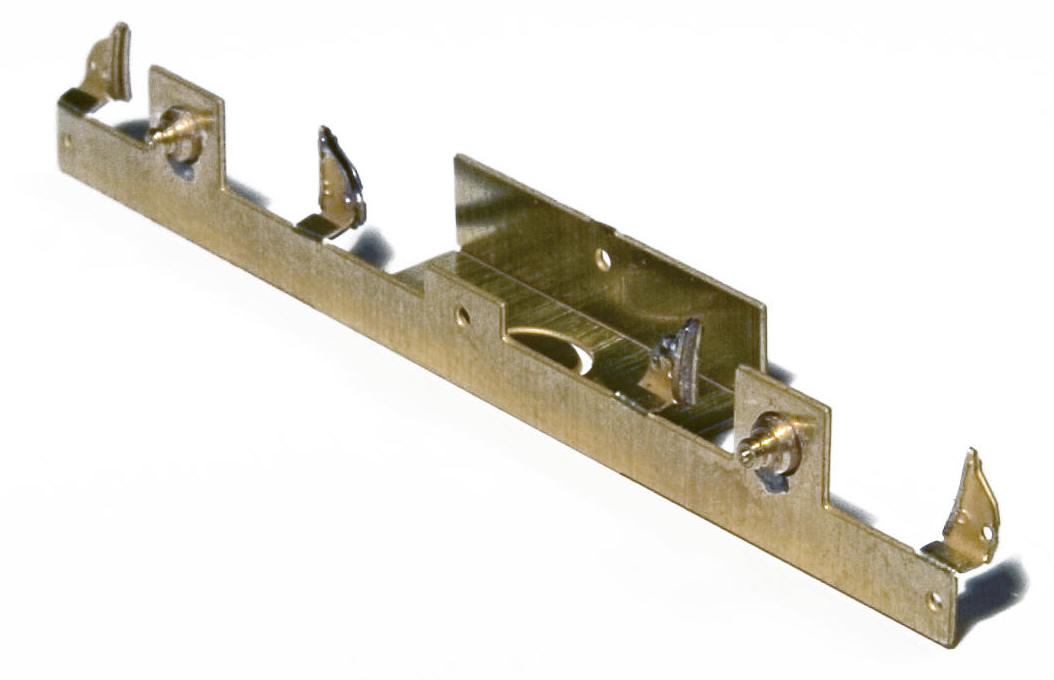
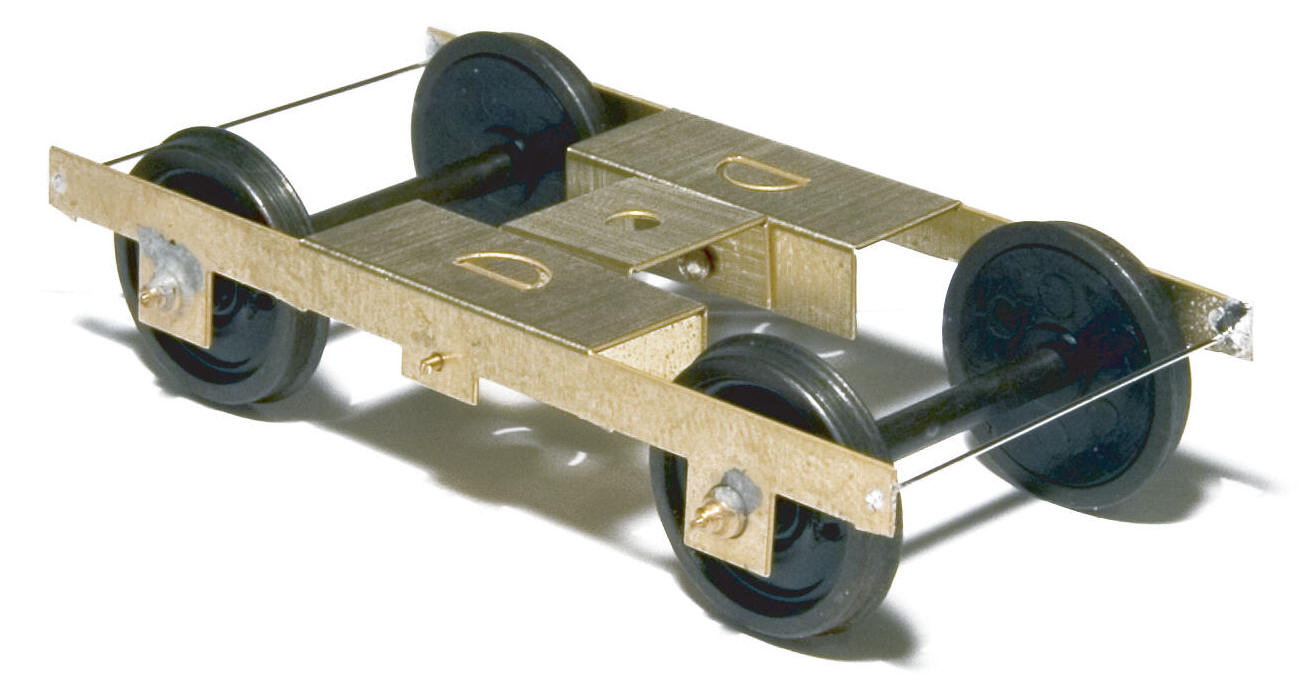
Begin by removing the parts from the fret using a sharp knife and cutting mat. As all four of the bogie sideframes are identical it is not important to keep them paired together. While the etches are flat solder your choice of bearings in place (note the detailed side of the brake shoes should face upwards when you do this). Fold the front and inner sides at a right angle to the top (do not fold the semi-circles upward at this stage). The additional brake shoes should be folded over behind the detailed ones. You can solder the inner ones at this stage if you want to, but don't do the outers yet. The brake shoes should be folded to a right angled S-shape as per the picture. |
 |
|
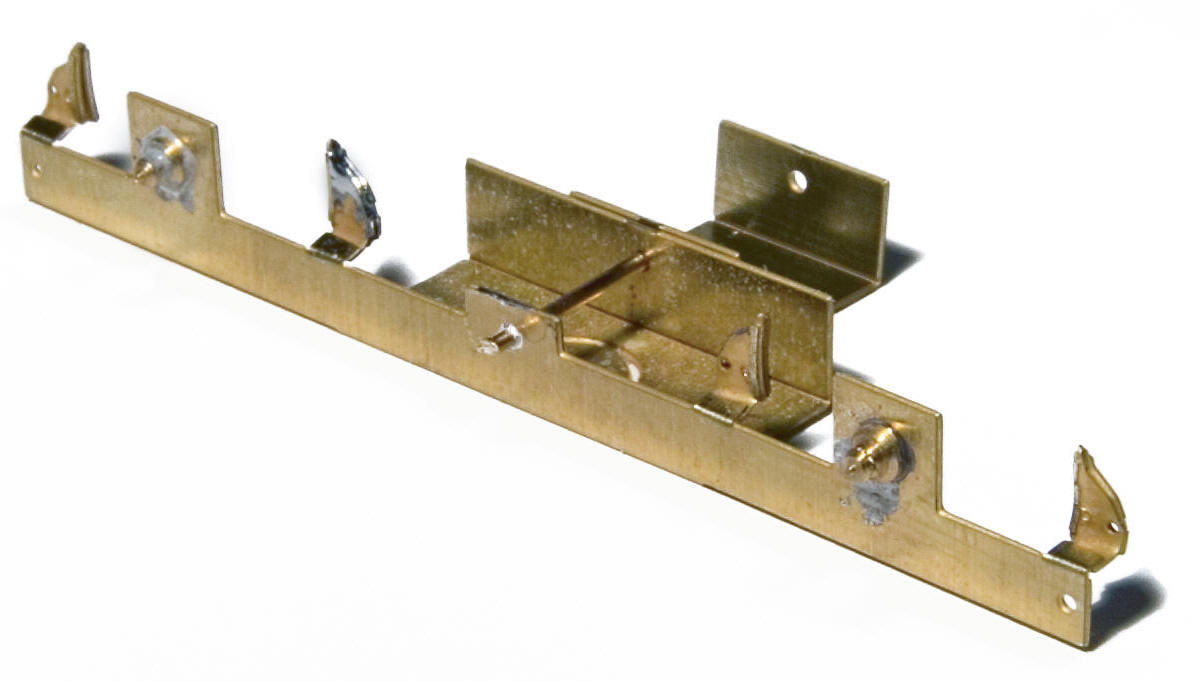
Fold the centre section to a U-shape and insert a pin from the inside facing outwards. This pin goes through the two holes in the outer frame and is soldered at the outer edge only. Ensure the pin is pressed hard against the sideframe when you do this so that the two parts don't wobble (it is best to lay the parts upside down on a flat surface when you do this). See the picture and repeat for the other side. Trim the pins (it is best not to trim them completely flush as this can weaken the joint). It is better to drill a small hole in the sideframe to allow for the pin to seat properly. |
 |
|
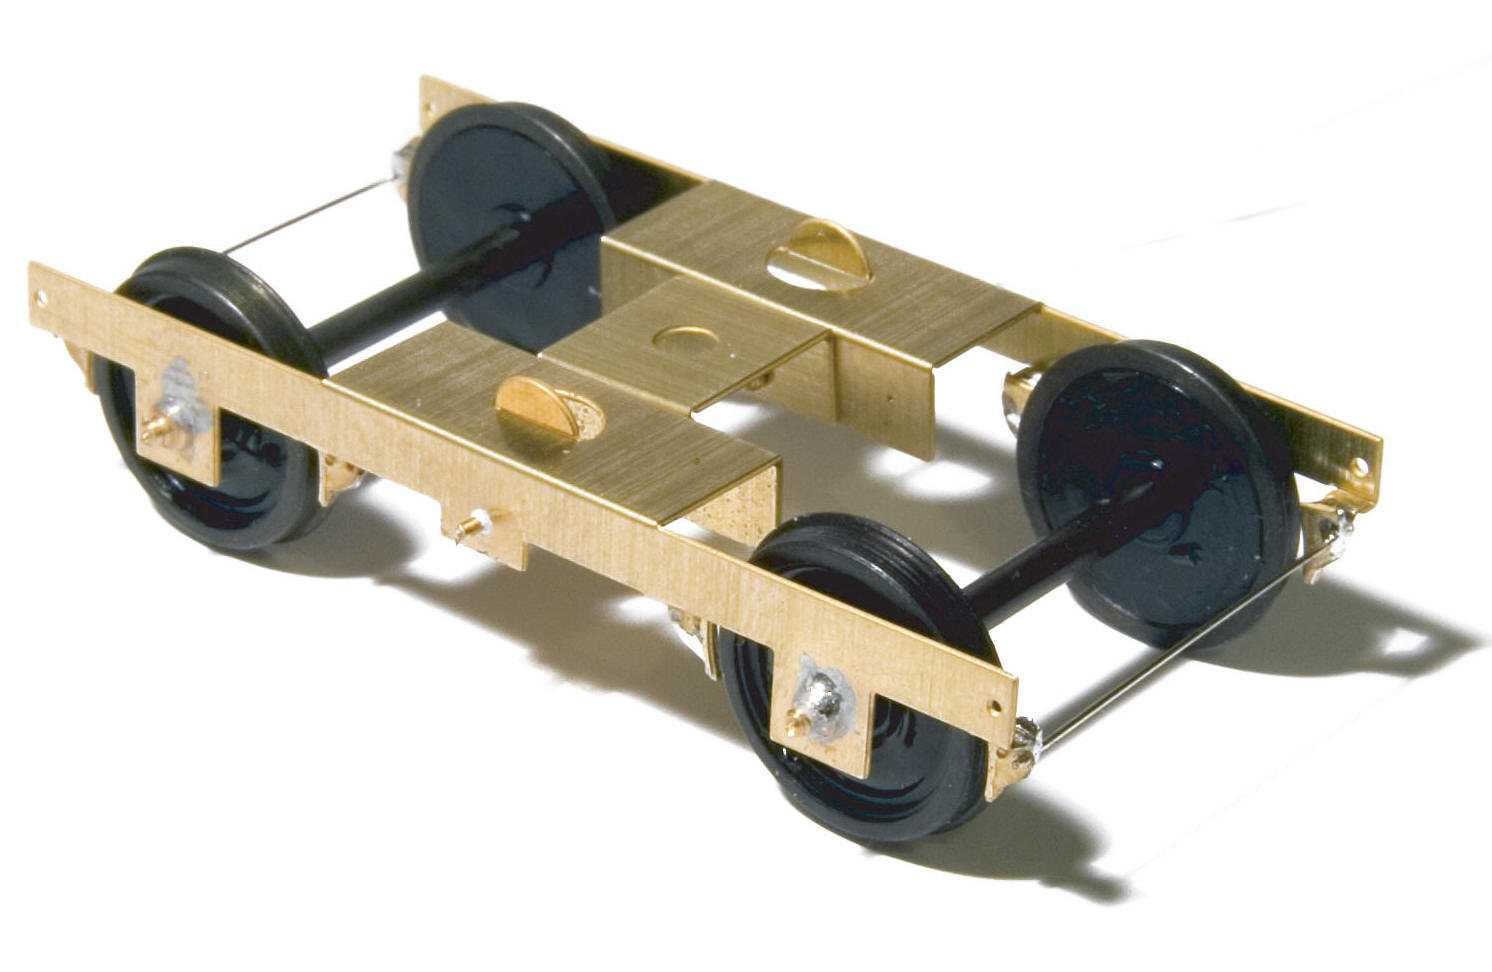
The bogie sides are free to rotate at this stage, so insert your wheels using a twisting action on the sideframes. Then insert a piece of the fine wire though the holes in the outer brake shoes. With the bogie the right way up and resting on a known flat surface (a piece of glass or a mirror is ideal) solder the wire in place ensuring there is no slop between the axles and the bogie. Repeat for the other end. |
 |
|
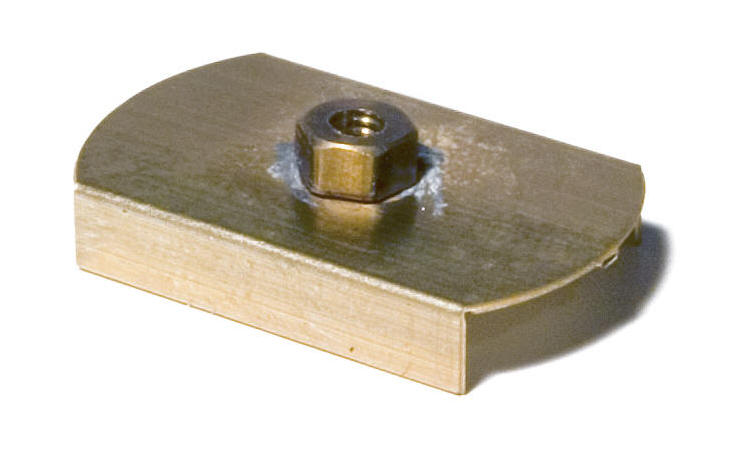
The base plate should be folded into a U-shape and the nut soldered into the recess in the top. On one bogie only, fold the half circles upwards. The bogie and baseplate can now be screwed together and offered up to your coach to check the ride height. The buffer centres should be 14mm above the track. Pack the baseplates or fold the sides out to a shallower angle as required. You may need to drill a hole to allow the screw to pass slightly into the floor of the coach. This is useful to ensure the baseplate is centred when finally fixing in place. |
 |
|
Some coach bogies do not have clasp brakes (those fitted to Mk3 coaches or Class 310/312 EMUs for example). If you don't want brakes, these can be removed (it is better to fold them back and forth a few times until the break off as cutting them can distort the sideframe slightly). To enable unbraked bogies to still function, holes have been provided in the sideframe (see picture) |
 |